
What is a template?
A template is a preset layout filled with tasks, events and headers, which makes it easy to use for recurring projects. The template will always be saved under the templates tab, so you can access it again anytime when you need to organize a project in the same format.
Build a template as you would a project. Then create brand-new projects using that template! Add descriptions to tasks, link their start and due dates, and build your ideal project layout. Whenever you use that template, everything will already be there!
Why create a template?
Templates let you launch projects in seconds! It's much faster than building separate projects each time. It also helps make sure nothing slips through the cracks.
For example, if you receive a new order, you need to follow certain steps each time to make sure it's processed. A simple example could be:
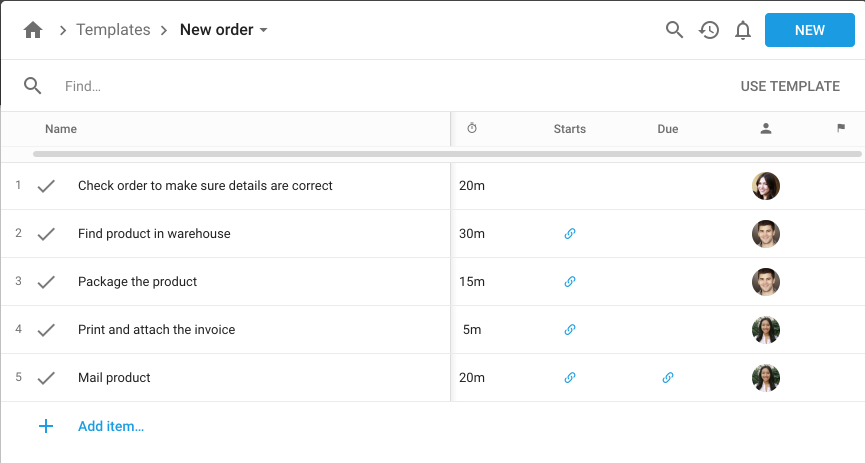
Check order to make sure details are correctFind product in warehousePackage productPrint and attach invoiceMail product
Each of these tasks need to happen in order; you can't package the product until you find it. And this is a process you'll need to repeat many times. So it's perfect for a template! Like this:
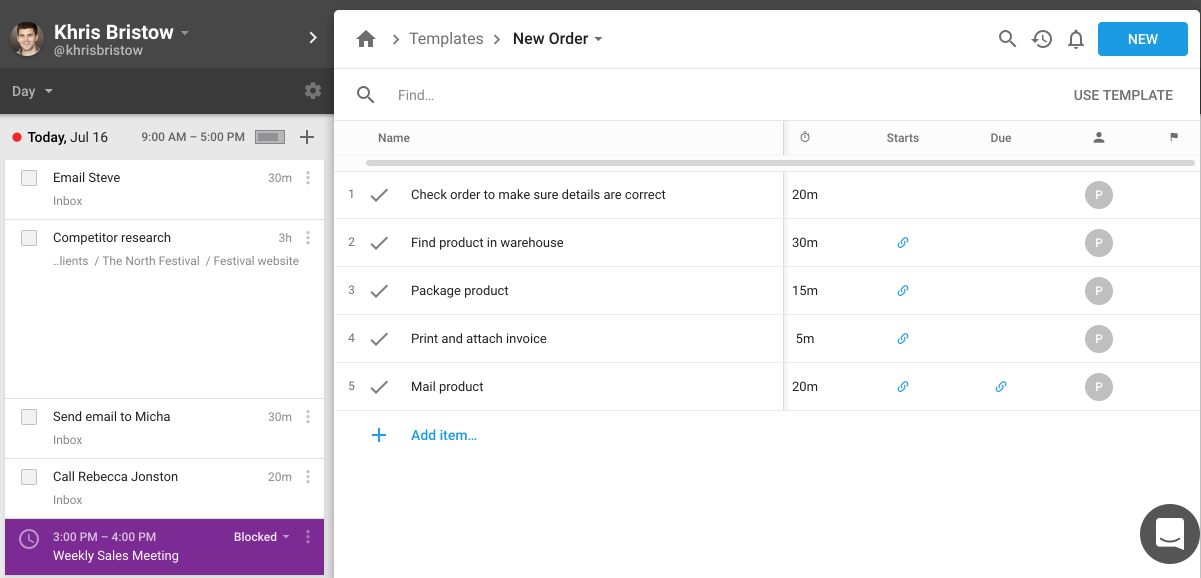
Every time you create a project using this template, the tasks will schedule in order. Let's dive into how we set this up.
How to create a new template
When you create an account, you'll find templates are already in your team's templates for you to use. One of these, A guide for templates, is a handy reference guide to using templates. The other three are example templates for how to structure your templates.
From the Home screen, click the Templates tab.
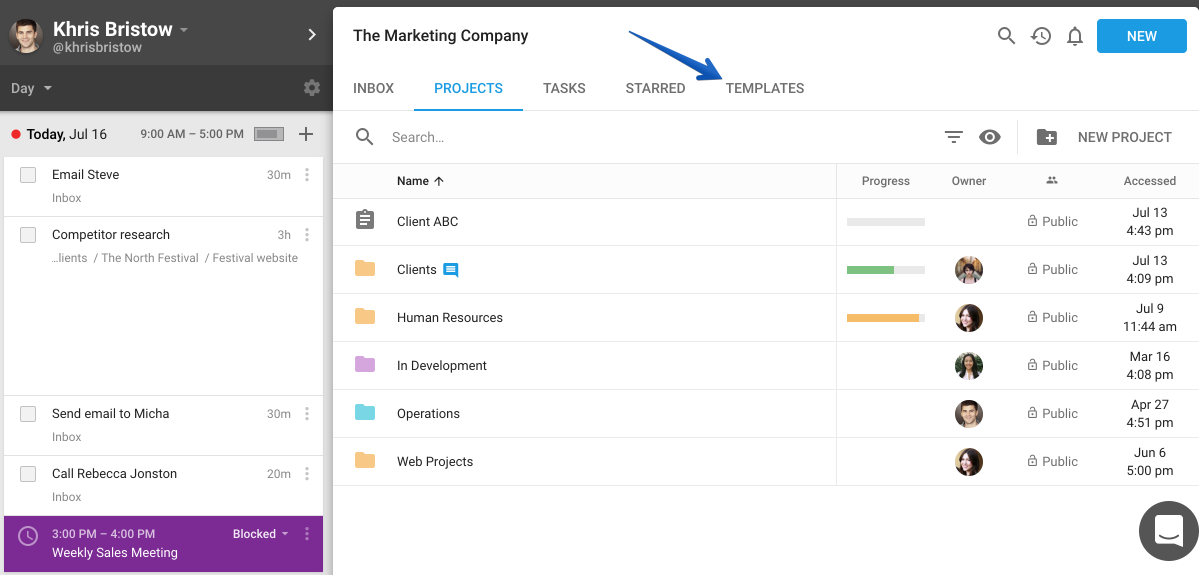
Here you will find your team's templates. Anyone you invite to your team will also be able to view and edit these templates. You can even assign tasks to your team members within a template! Whenever you use that template, the task will always assign to the team member you choose. The default assignee is the project creator. This means that the task will assign to whoever launches the template.
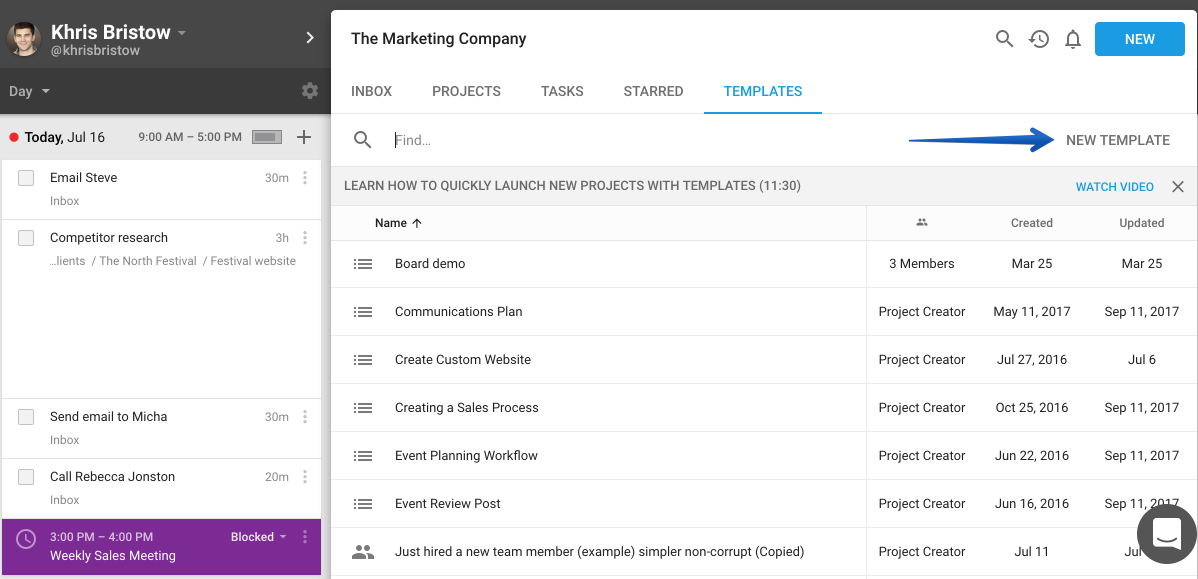
Click the NEW TEMPLATE button to start creating a new template, give the template a name, then click CREATE.
Add tasks
Let's build our example above. The first step is to type in each task:
Check order to make sure details are correct for 20mFind product in warehouse for 30mPackage product for 15mPrint and attach invoice for 5mMail product for 20m
TimeHero will automatically detect the duration of the task. You'll notice that unlike projects, these tasks aren't scheduled in your calendar – that's because this is just a template. Once we use the template to create a project, the tasks will schedule. Click "+ Add Item" to add new tasks in the template.
Link tasks
The next step is to link the tasks together so that they all schedule in order. Starting with the second task "Find product in warehouse" click under the 'Starts' column to create a link:
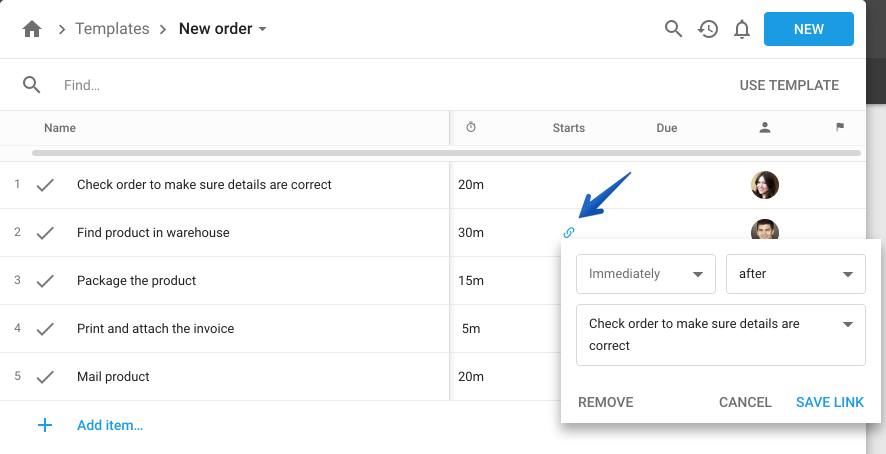
Working your way down, add a link to each subsequent task to start immediately after the previous task. When you use the template, this will make sure that you don't mail the product before you attach the invoice!
You can also link due dates! Our goal is to get products shipped within one day of ordering, so let's link the due date for "Mail product" to be 1 day after "Check order to make sure details are correct," like this:

Assign tasks
By default, template tasks are assigned to the "Project Creator" represented by a grey P icon. TimeHero will assign these tasks to whomever launches the project!
If you've got certain roles within your organization, you can also assign template tasks to specific team members. Every time you use the template, TimeHero will assign the task to that team member, schedule it in their calendar and automatically keep them on track!
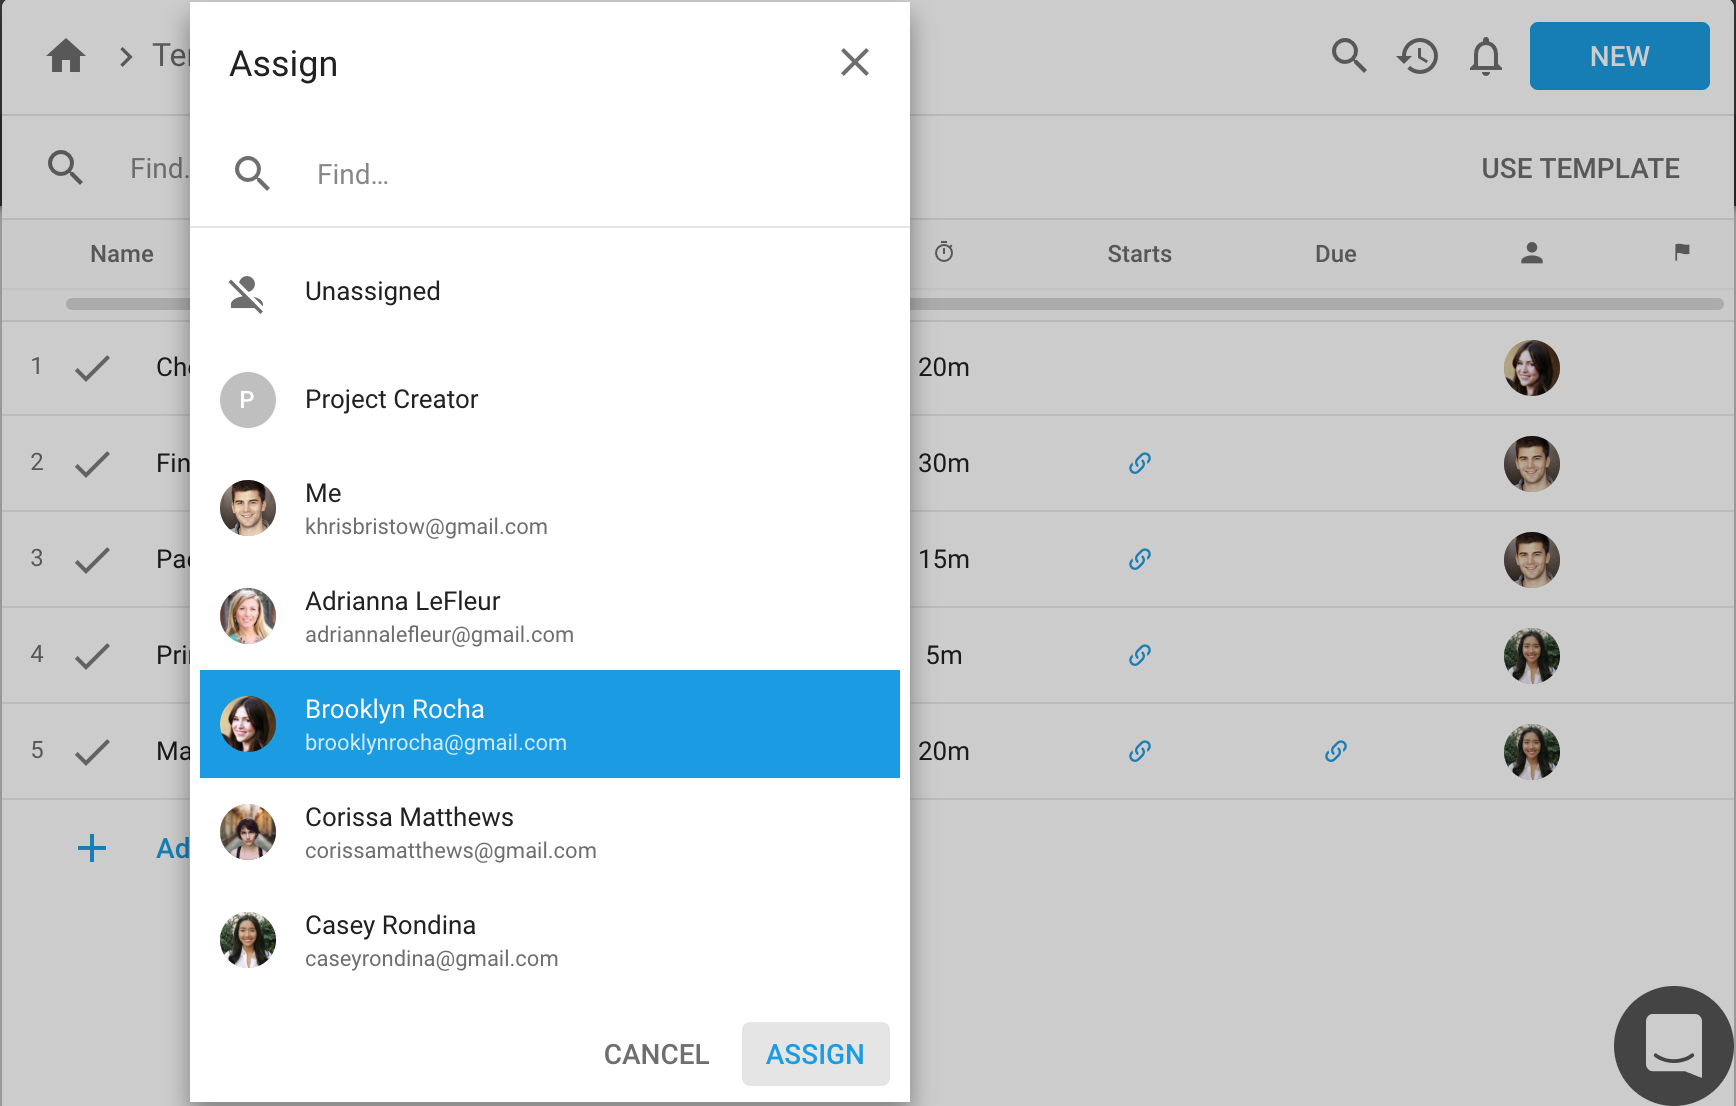
In this example, Brooklyn always checks our orders. To assign a task, click the assignee icon next to the task:

Then choose a team member and click ASSIGN:
And now the template is ready to go!
How to use the template
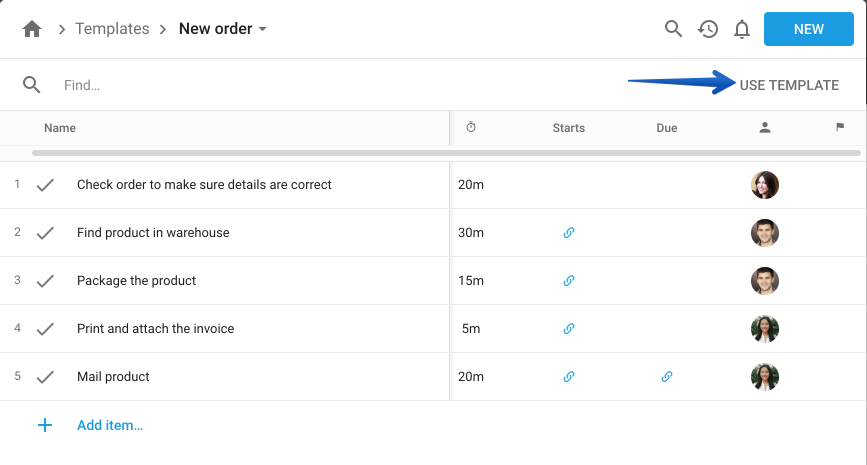
To use a template, click the USE TEMPLATE button.
Then fill in the name of the project and start and due date if any. TimeHero will turn dates blue to show that it will program the project and tasks according to the assigned dates. Once you are done, click CREATE.

Your final project you created with the template will look something like this:

The project will now schedule all tasks in order from the date scheduled to start and have you on track to get the project finished for the scheduled due date. If you need to use the same template in the future, simply go to the TEMPLATES tab and scroll till you see your template. Click it and then select USE TEMPLATE and continue the same way we did above.
Happing templating!!!


